How To Use Block Yourself From Analytics? [USER GUIDE]

In this blog we are going to share how you can use our Free Google Chrome Extension Block Yourself From Analyticsso you can block your IP, visits from Google Analytics and can get the most accurate data of your website traffic.
As we explained earlier in our previous blog posts and guide that our Block Yourself From Analytics is a free Chrome Extension tool where you can add websites URLs that you do not want to track by your Google Analytics to get the right data. Getting the accurate data can help you to make accurate future decisions about your online business.
How To Use The “Block Yourself From Analytics Extension”?
Following the easy steps to install and use our extension to get the best result out of it.
- Go to Google Chrome Web Store
- Search for Block Yourself From Analytics
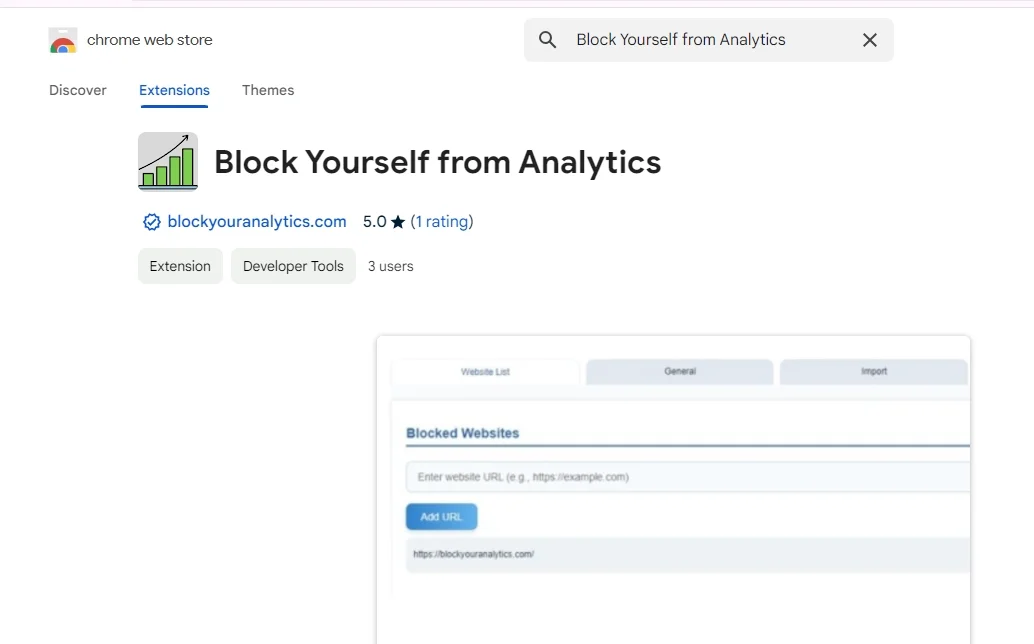
- Choose the one with our logo as you can see in the image, you can also see our website URL blockyouranalytics.com for confirmation just under the main extension name.
- Click on add to Chrome
- It will take few seconds to download and install it in your browser
- Once the installation process complete you can start using it.
Below are the step by step guide on how to use it.
Search for Block Yourself From Analytics

As you can see in the image above, this is how our extension will look like in Chrome Web Store. You need to instll only the right extension. Once you install it you can start adding URLs that you want to stop from Analytics.
Click on the Options
After installation when you open the extension you can see a button “Options”. Click on this button. It will take you to another window where you can actually perform the real tasks and block IPs and URLs.
What Are The Options In Our Extension?
- Website List
- General
- Import
- Export
- Diagnostics
You can use all these options and perform the task in a best possible way
Website List
This is the most important tab in the extension. Actually you installed this extension for this part. So it is very crucial for you to know everything about this tab. This is the place where you can add all the URLs that you want to block. You can add them one by one in this tab. You cannot add duplicate URLs. If you want to add multiple URLs at once you can also do that with our extension. To block multiple URLs you can use the import tab and add a list of URLs at once.
Import
This is another useful tab for those who are running multiple sites and managing their Google Analytics accounts from a same system or IP. This tab will allow you to add multiple URLs in onc time so you can save a lot of time. To import URLs the best way is to prepare a file in your local machine first and list all the URLs (should be correct and no duplicate). Once your list is compelte just copy it and paste it in the given field one URL per line.
Export
In the Export tab you can see all the blocked URLs if you want to check which URL is added to block. And if you want to remove any of them you can also do that from here easily. Once you removes any URL it will again start counting the visits in your Googel Analytics account.
Diagnostics
Another important feature of Block Yourself From Analytics Extension is the Diagnostics Tab where you can check for errors. Let suppose you added a URL to block from Analytics and verifying it from your analytics account may take a long time. So you can do that right here using our extension.
Conclusion
So this is the complete use guide about how to use our extension to block your IP in Google Analytics. All the steps are explained so you can easily understand every aspect of the extension before start using it. Also once you understand it you can use it in a most efficient way.
